Learn how to record a video presentation directly from your web browser using slides, a webcam overlay, dynamic screen sharing, and AI voiceover narration—no software downloads or video editing skills required.
How to Record a Video Presentation: Step-by-Step Guide
This complete guide shows you how to record a video presentation with slides, webcam, and voiceover using Slideator. Whether you need to record PowerPoint with a webcam overlay, present a PDF online, or generate AI voiceovers for asynchronous video lessons, Slideator provides a browser-based presentation recorder built for educators, course creators, and sales teams.
What is a Video Presentation Recorder?
A video presentation recorder allows you to capture your slide deck (PPTX, PDF, Google Slides) alongside a live webcam feed, microphone audio narration, and digital whiteboard annotations into a single video file or live stream.
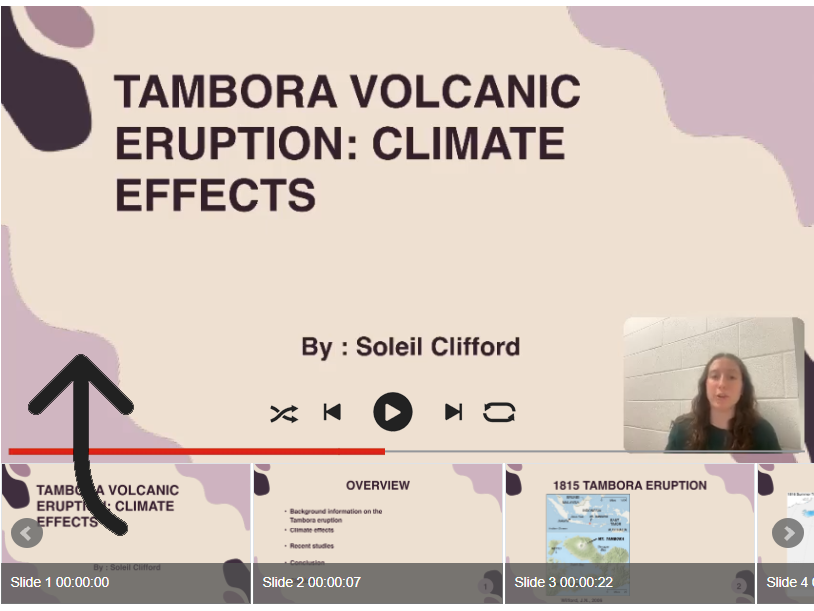
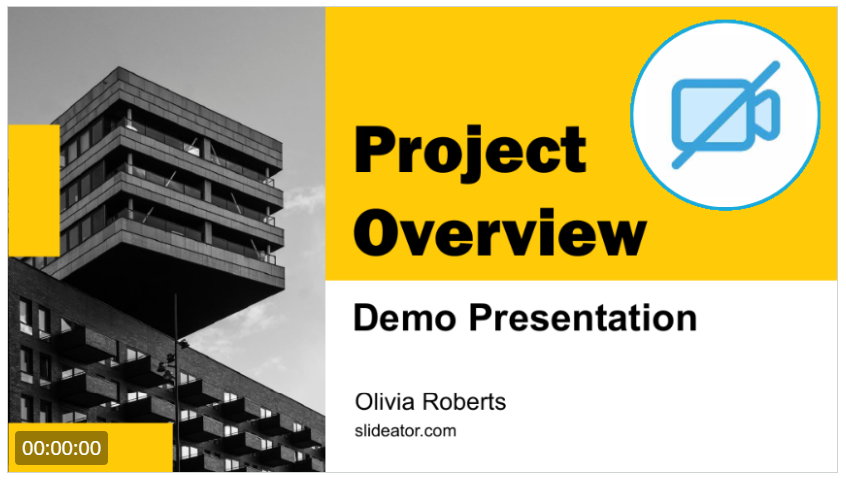
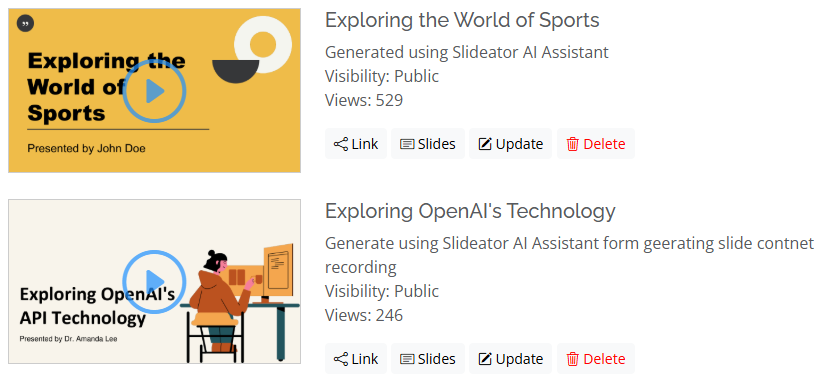
Example of a professional slide recorder session with webcam overlay and slide navigation
Key Benefits of Asynchronous Video Presentations
Recording video presentations enables flexible asynchronous learning, increases viewer comprehension through visual and auditory cues, and allows content creators to reuse video assets across multiple platforms.
What Is Slideator Presentation Recorder?
Slideator is an online slide recorder and video presentation platform designed to help creators present, record, host, and share interactive video content directly inside their web browsers without installing extra extensions or software.

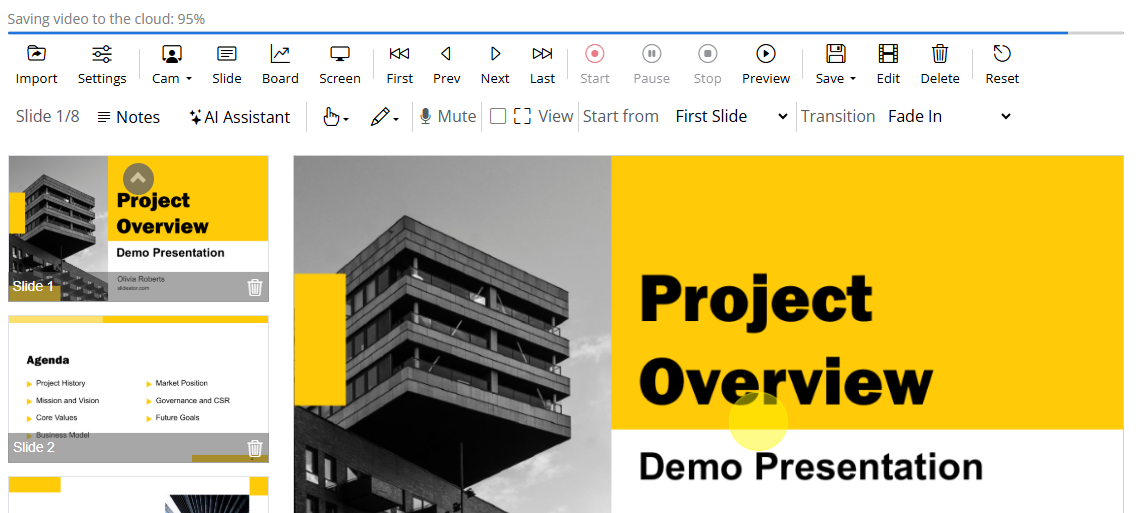
Slideator Browser-Based Presentation Recorder Interface
Why Choose Slideator to Record Slides with Webcam?
Slideator combines slide-by-slide recording precision with automated AI voiceover and whiteboard features that typical screen recorders lack.
Essential Slideator Features
- No-download recorder: Record PDF or PowerPoint presentations online directly in Google Chrome or Edge.
- AI Voiceover Narration: Automatically turn slide scripts into natural, human-like voiceover audio.
- Interactive Whiteboard & Annotation: Draw, write, and highlight directly on your slides during presentation recording.
- Flexible Camera Layouts: Switch between picture-in-picture webcam, full-screen speaker, or slide-only modes.
- Local Privacy Recording: Your audio and video process locally in your browser before publishing.
Maximizing Your Video Presentation Quality
Elevate your recorded slides into professional instructional videos using Slideator's real-time tools like digital markers, AI scripts, and multi-media embeds.
Prepare Your Slides (PowerPoint, PDF, Google Slides)
You can record a presentation using existing slide decks or export them into supported formats. Slideator imports slide decks effortlessly so you can start recording in seconds.
Compatible Slide Formats & Tools
- Supported Files: PDF, PPTX, Google Slides, Keynote exports
- Cloud Presentations: Import directly or record Google Slides and Canva presentations with webcam
- Mobile & Web: Record slides from desktop browsers, tablets, or mobile devices
Generating Slide Scripts with the AI Assistant
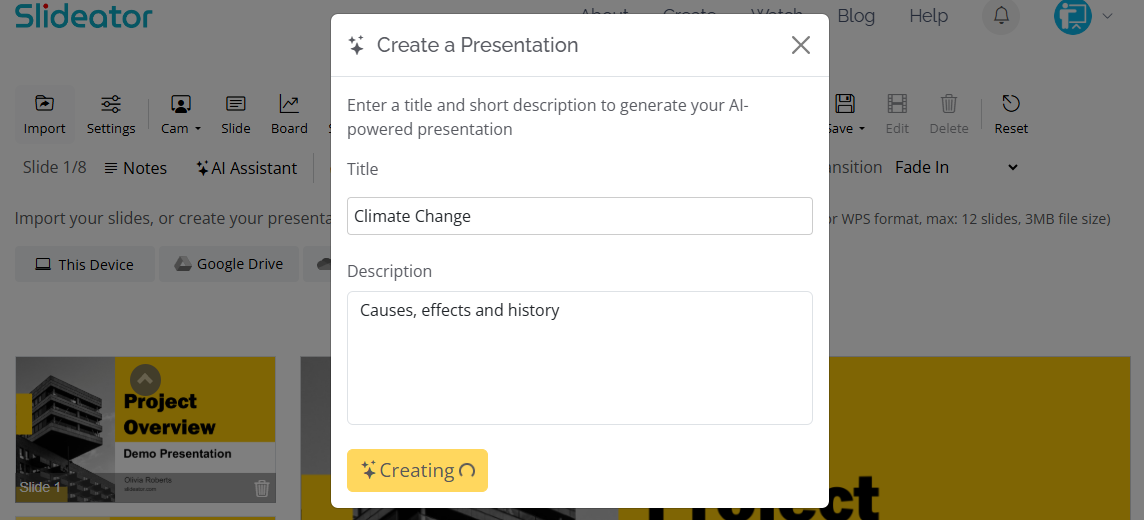
Before you record video presentation scripts, use Slideator's integrated AI Assistant to structure, write, and refine your speaking notes.
Step 1: Generate Outline & Script
Type your presentation topic or paste an outline. The AI Assistant generates slide titles and structured script notes.
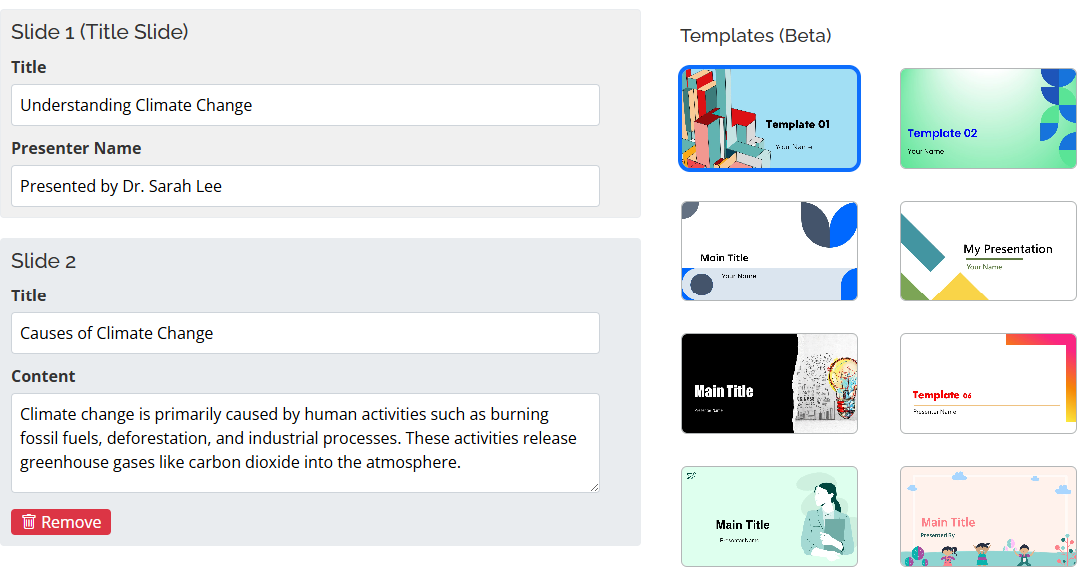
Step 2: Edit & Refine Content
Review the generated slide content, tailor the explanations for your audience, and refine bullet points.
Step 3: Choose Voiceover Mode
Read the AI script aloud yourself using your webcam and mic, or convert the text directly into automated AI voiceover audio.
Using Real-Time AI Tools Inside the Presentation Recorder
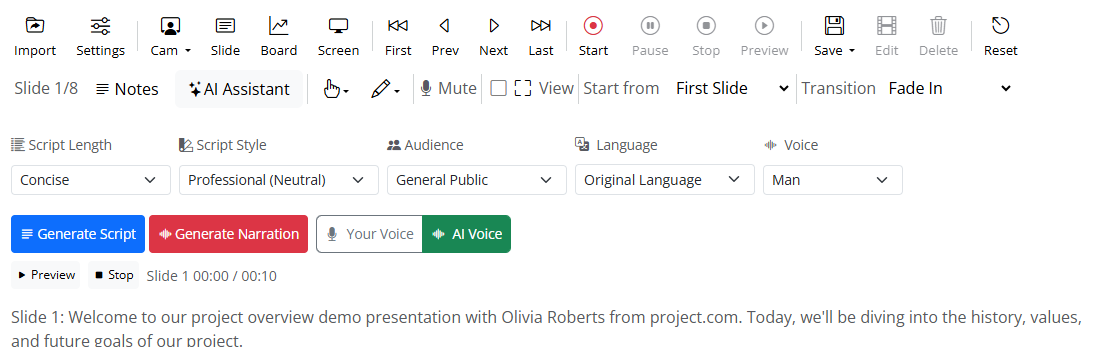
Slideator’s AI tools operate directly inside the recorder interface so you can adjust your script, ask clarifying questions, or adapt your tone while creating your video.
AI Video Script Assistant
Generate a complete slide-by-slide narration script based on your slide text to ensure a smooth, professional speaking tone during recording.
- Generate tailored presentation scripts for all slides
- Edit talking points prior to clicking record
- Sync scripts with manual mic input or automated AI voiceover
Discuss This Slide Feature
Stuck on how to explain a complex diagram or graph? This tool breaks down individual slides into easy-to-explain points for your video lesson.
Interactive Q&A Generator
Anticipate learner questions by generating common inquiries for each slide and presenting clear answers directly in your video script.
Simplify Complex Concepts
Instantly rewrite technical slide text into conversational language suitable for general audiences or non-native English speakers.
Adjust Tone and Audience Settings
Set your presentation recorder tone to Academic, Corporate, Conversational, or Enthusiastic to best match your target viewers.
YouTube Compliance Review Guidelines
Overview
If you plan to submit your recorded video presentation to the official Slideator YouTube showcase, your video undergoes a routine compliance check to ensure quality and copyright standards.
Why YouTube Compliance Matters
Quality checks protect creators and viewers from copyright claims, low audio quality, or unauthorized reuse of material.
Compliance Review Criteria
1. Licensed or Royalty-Free Media
- Use only royalty-free audio, open-source background tracks, or original speech.
- Images, diagrams, and visual assets must be original, AI-generated, or properly licensed.
2. Original Video Content
Videos must be recorded using Slideator tools rather than re-uploading copyrighted third-party videos.
3. Privacy and Personal Information Protection
Ensure no confidential phone numbers, private emails, or personal identification details are visible in your presentation slides or screen recordings.
4. Family-Friendly Standards
Keep presentation content professional, educational, and suitable for general audiences.
5. Transformative Educational Value
Recorded videos should offer genuine commentary, instruction, or creative analysis beyond just repeating slide text.
How to Record and Live Stream Video Presentations
Follow these quick steps to record PowerPoint with webcam, present PDF slides online, or host a live interactive presentation session.
1. Import Slides or Open Slide Creator
Import your existing presentation files (PDF, PPTX) from your device, Google Drive, or OneDrive. You can also build slides from scratch using Slideator's built-in browser Slide Creator.

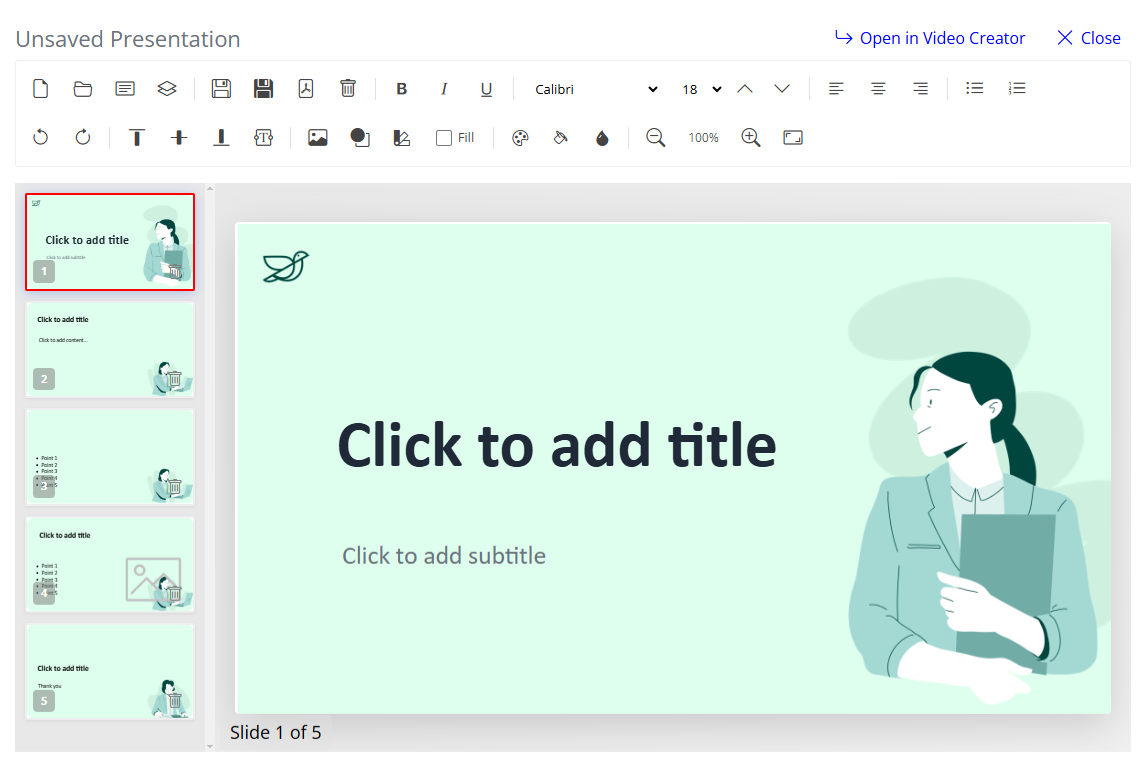
Creating Slides with Slide Creator
Slide Creator is an online editor built for fast presentation design. Format text, insert high-res images, and order slides without needing desktop software.
2. Configure Webcam and Microphone Settings
Select your preferred microphone, test audio levels, and pick your camera source in the camera settings menu before recording.

3. Select Video Quality / Resolution
Choose your target output resolution (HD 720p or Full HD 1080p) to match your audience's device requirements.
4. Start Presentation Recording
Click Record to start capturing your presentation. Navigate through your slides using keyboard arrows or on-screen controls as you speak.
5. Live Stream Your Presentation
Broadcast your presentation live with interactive chat, audience messaging, and hand-raising features.
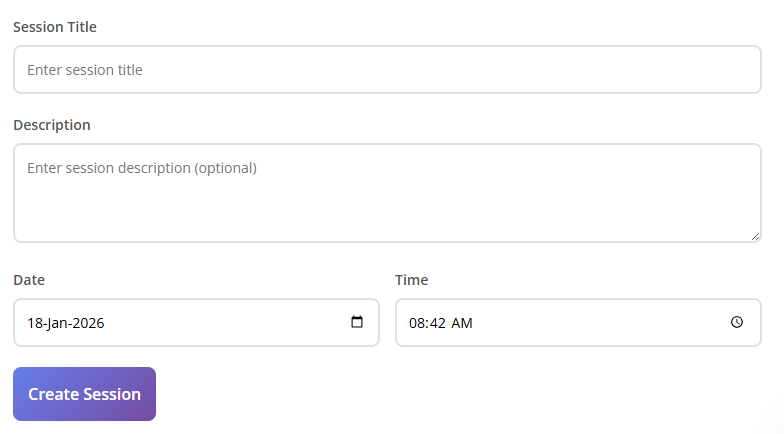
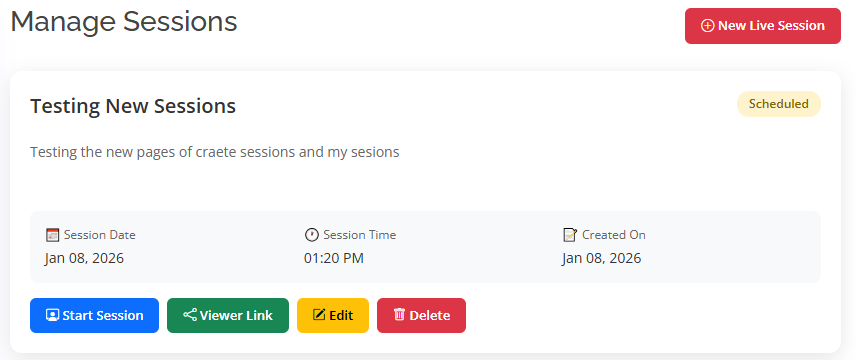
- Create a Live Session: Open My Sessions and click New Live Session. Set your title, date, and description.
- Copy Broadcast Links: Share the Viewer Link with your audience and use the Presenter Link to host.
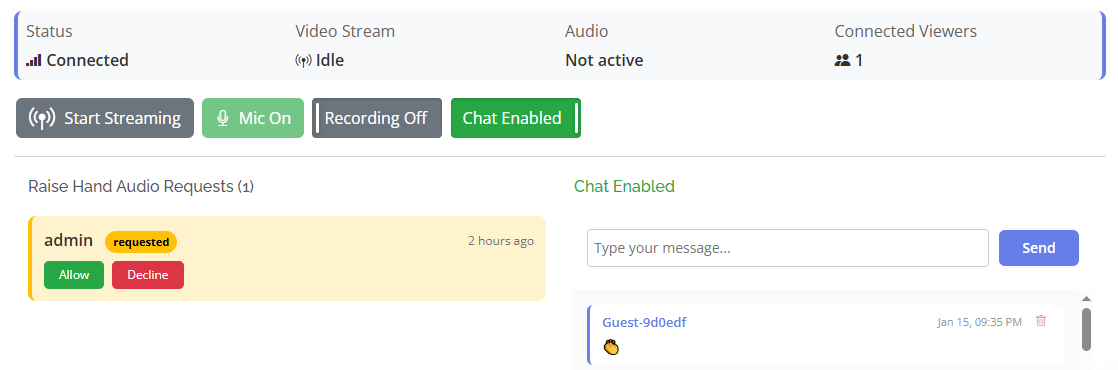
- Configure & Broadcast: Turn on audio recording or live chat, then click Start Streaming.
- Interact in Real Time: Address audience chat questions and approve viewer "Raise Hand" requests to let them speak.
- Save Recorded Session: Click Stop Streaming. If recording was enabled, your live stream automatically converts into a saved video file.
6. Generate Automated AI Voiceover Narration
Prefer not to speak? Select an AI voice actor to read your slide notes automatically in crisp, natural accents.
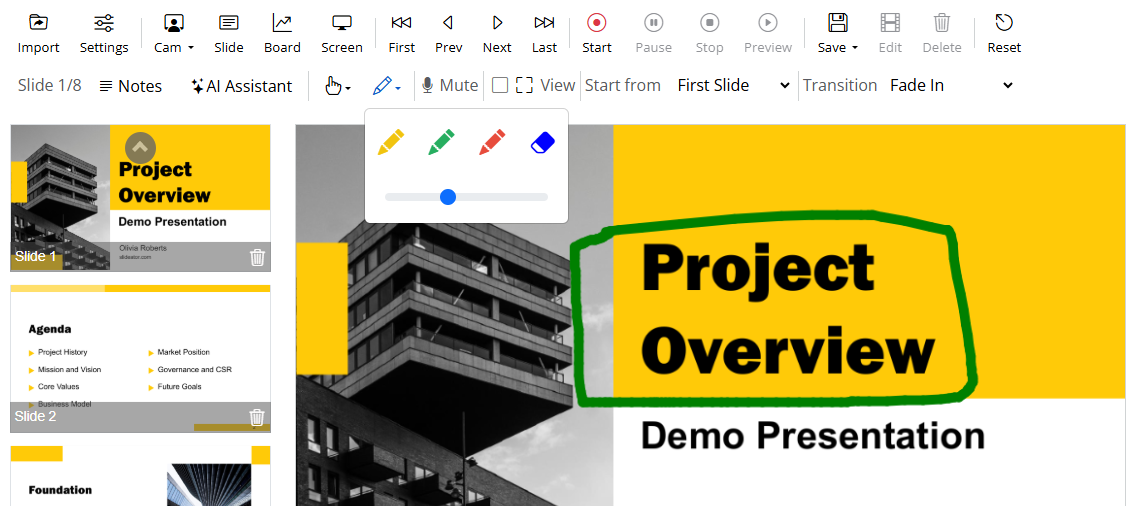
7. Annotate Slides with Digital Markers
Emphasize critical points using digital markers, colored pens, and spotlight tools on top of your slides while recording.
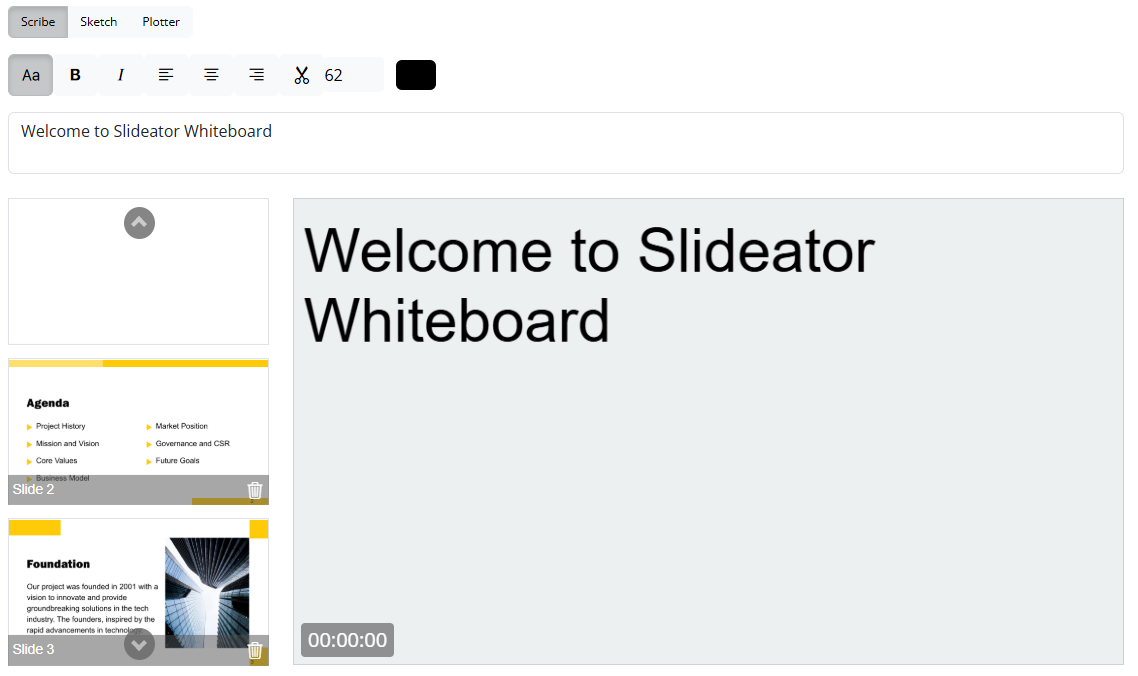
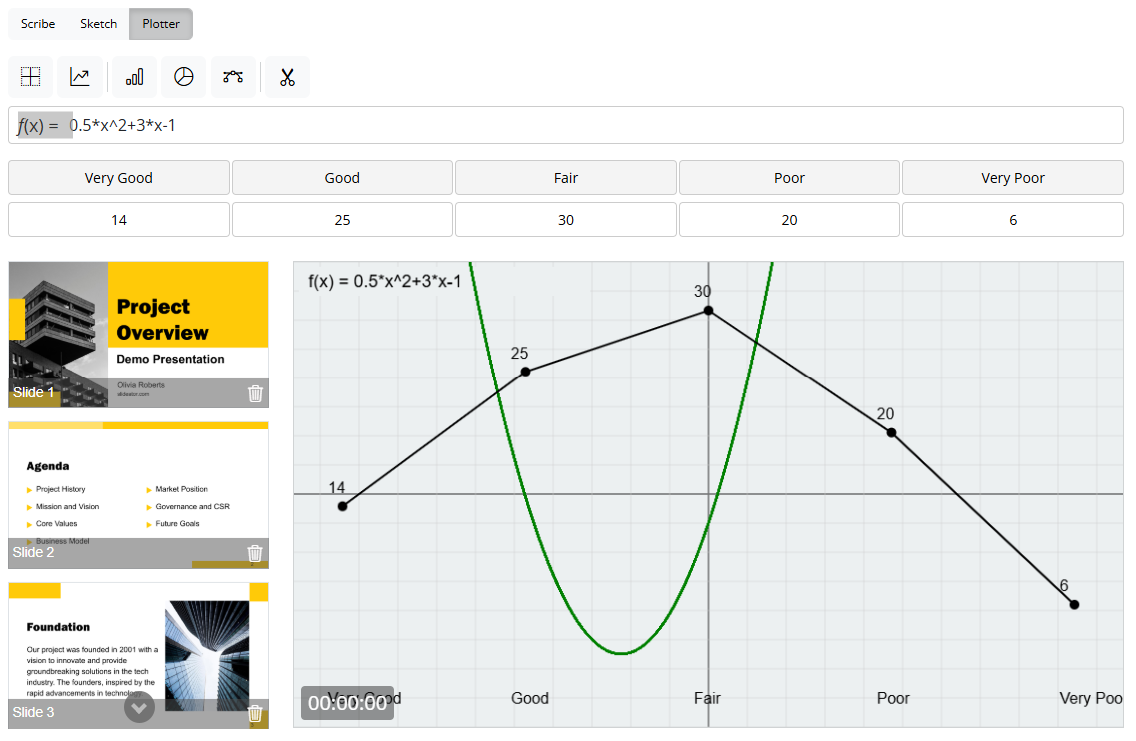
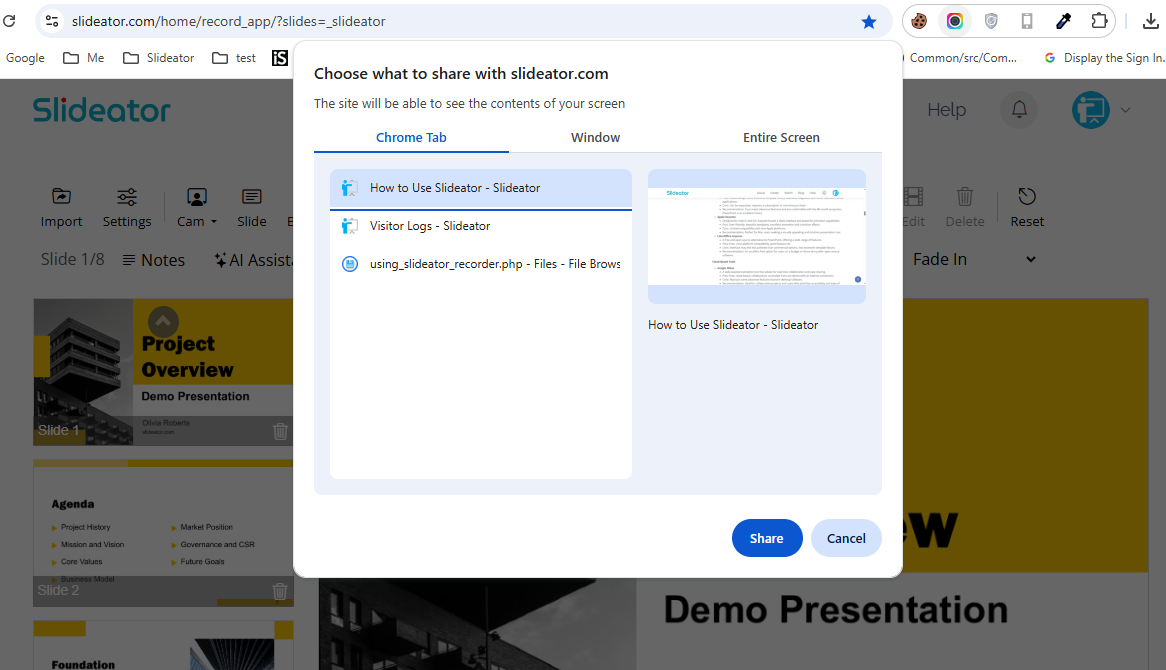
8. Use Digital Whiteboard & Screen Capture Tools
Switch seamlessly between your slides, an interactive whiteboard for mathematical equations/drawings, and full screen sharing.

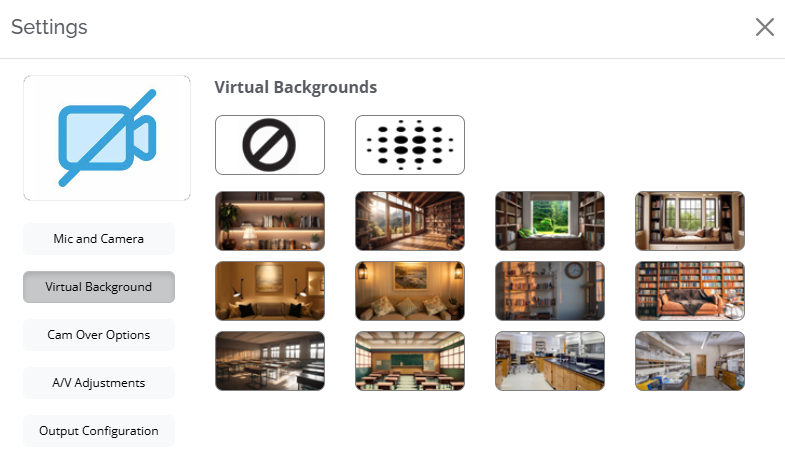
9. Choose Webcam Position & Virtual Layouts
Position your webcam feed over your slides using picture-in-picture, side-by-side mode, or virtual background overlays.
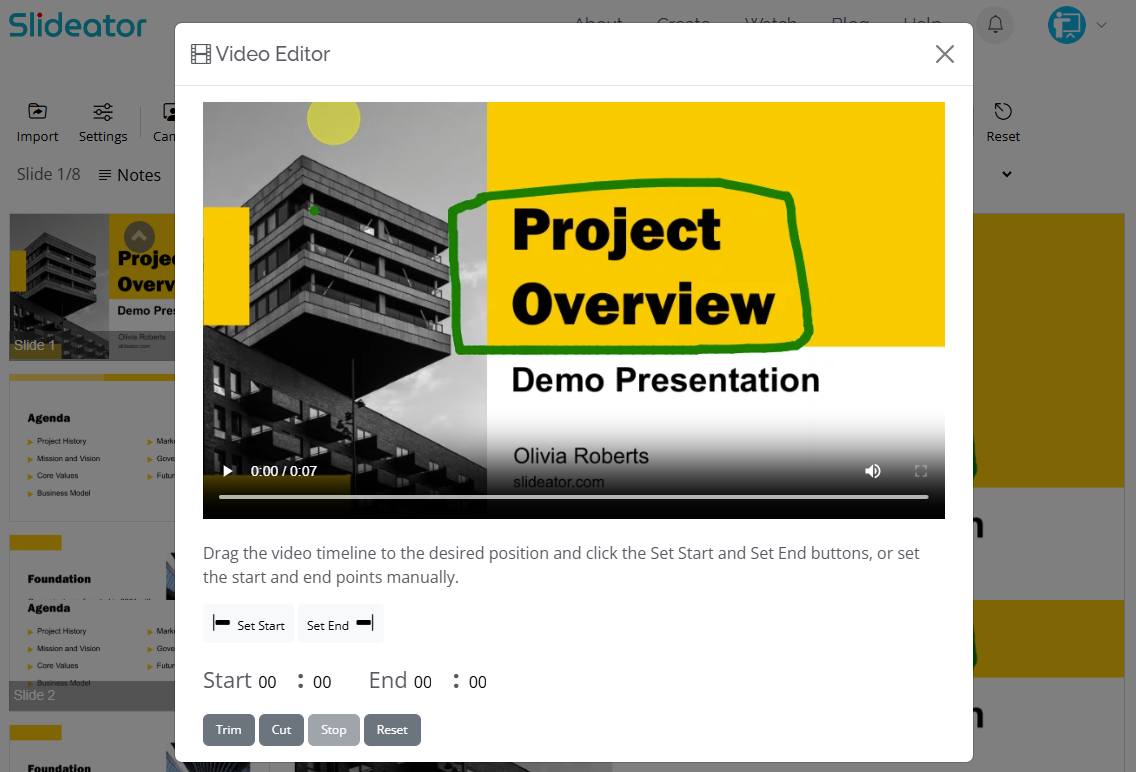
10. Preview and Edit Your Presentation Video
Click Stop to finish recording. Review your playback, trim unnecessary pauses, and verify your audio quality.
11. Re-record or Redo Specific Sections
If you made a mistake, discard the session with one click and start fresh without losing your slide setup.
12. Save MP4 or Publish to Slideator Cloud
Download your video presentation locally as an MP4 file or publish it directly to Slideator for easy link sharing and LMS embedding.

Best Practices for Effective Video Presentations
Follow these quick technical and visual tips to ensure your recorded presentations hold audience interest.
Keep Text Concise
Stick to 3–5 bullet points per slide. Let your voiceover or webcam explanation deliver the detail while slides stay clean.
Use Clear Visuals & Diagrams
Opt for crisp vector icons and high-resolution diagrams over small, low-resolution text images.
Pick High-Contrast Typography
Use sans-serif fonts (like Arial, Helvetica, or Open Sans) with strong visual contrast against light backgrounds.
Use an External USB Microphone
Clear voiceover audio is essential for engaging presentations. Use a dedicated USB mic or headset mic rather than built-in laptop microphones.
Enable Webcam Overlay
Showing your face via webcam overlay builds trust, humanizes instructional content, and improves viewer retention.
Set Eye-Level Camera Framing
Position your camera at eye level and sit in a well-lit area so viewers can see your facial expressions clearly.
Practical Use Cases for Slide Recording
Slideator supports a broad range of educational, professional, and corporate communication needs:
- Flipped Classrooms: Record pre-class slide lectures for students to watch before in-person seminars.
- Online Course Creation: Build modular video lessons for online training platforms and LMS portals.
- Sales & Product Demos: Record pitch decks with webcam video to send personalized sales walkthroughs.
- Asynchronous Team Updates: Share project walkthroughs across remote teams without scheduling extra meetings.
- Exam & Solution Reviews: Walk through step-by-step math, science, or code solutions using the whiteboard marker.
Troubleshooting Common Recording Issues
- Recommended Browsers: Use Google Chrome, Microsoft Edge, or Brave for optimal webcam and screen recording performance.
- Audio Checks: Grant browser permissions for mic and camera before clicking record.
- Performance Tip: Close heavy background apps or unused browser tabs to free up system memory for smooth recording.
- AI Voiceover Sync: If AI speech generation hangs, refresh the browser session; your imported slides remain intact.
Privacy & Data Security Notice
Your privacy is prioritized. Slideator records video presentations locally in your browser session using web technologies like WebRTC and HTML5 Canvas.
Security Highlights
- Local Processing: Videos record directly in your device RAM during session recording.
- No Forced Uploads: Download your finished MP4 video presentation directly to your drive without publishing.
- Control Sharing: Your presentation remains completely private until you explicitly choose to publish or stream.