Introduction
In today's fast-paced world, capturing and retaining attention is paramount. Whether you're an educator, a business professional, or a student, the ability to communicate effectively through dynamic visuals is a game-changer. That's where video presentations come in.
What is a Video Presentation?
A video presentation is a dynamic and engaging method of communication that transcends the limitations of traditional presentations. It's a powerful way to share information using a strategic combination of visuals, such as slides, images, and animations, along with audio, including voiceovers, music, and sound effects, and text.

Example of a professional video presentation
Why Video Presentations Matter
Video presentations excel at engaging audiences in ways traditional methods often fail to achieve. They boost comprehension, improve retention, and foster a more interactive learning experience.
What Is Slideator?
Slideator is a pioneering academic platform developed to empower educators, students, and professionals to effortlessly create, host, manage, and share video presentations directly from their browsers on any computer or mobile device.
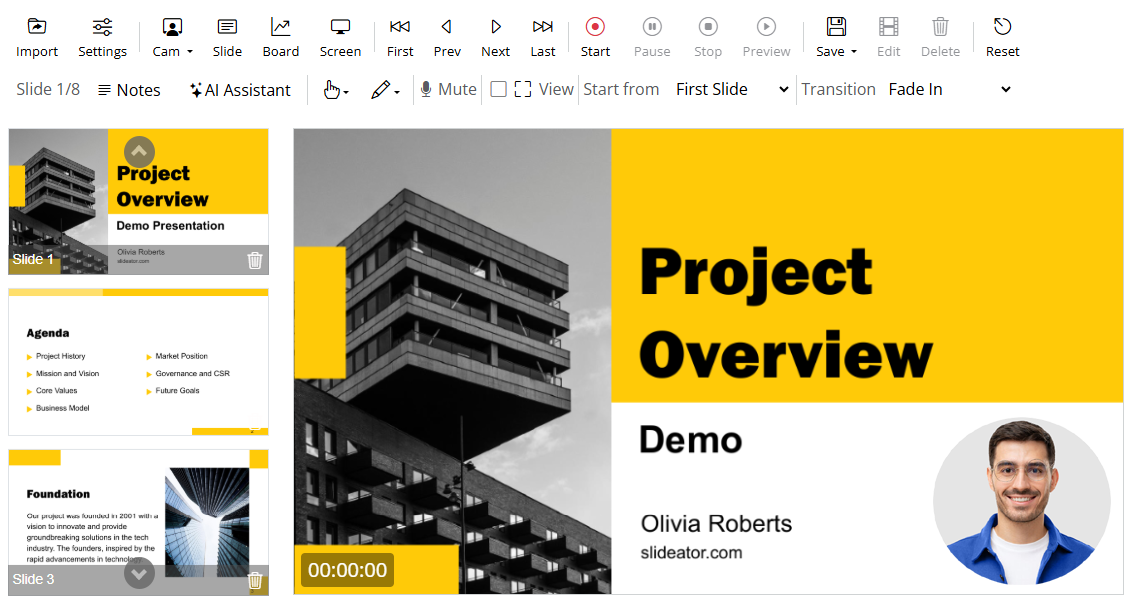
Slideator's intuitive video recorder interface
Why Choose Slideator?
Slideator distinguishes itself from other video presentation recording tools through a unique combination of features, ease of use, and integration capabilities.
Key Advantages
- Browser-based - No downloads or installations required
- AI-powered narration assistant
- Multiple media support (camera, whiteboard, screen capture)
- Seamless LMS integration
- Privacy-focused local recording
Maximizing Your Presentation Impact
Beyond simply recording slides and video, Slideator offers a suite of advanced tools designed to elevate your video presentations and maximize audience engagement.
Prepare Your Slides
Slideator empowers you to create engaging video presentations from your existing files (PPTX, PDF, Google Slides, etc.). While Slideator creates video presentations, it doesn't create presentation files or slides.
Supported Presentation Tools
- Desktop: Microsoft PowerPoint, Apple Keynote, LibreOffice Impress
- Cloud-based: Google Slides, Canva Presentations
- Mobile: Google Slides app, PowerPoint mobile, Canva mobile
AI Assistant
Creating impactful video presentations involves more than just assembling slides; it requires a compelling narrative and engaging delivery.
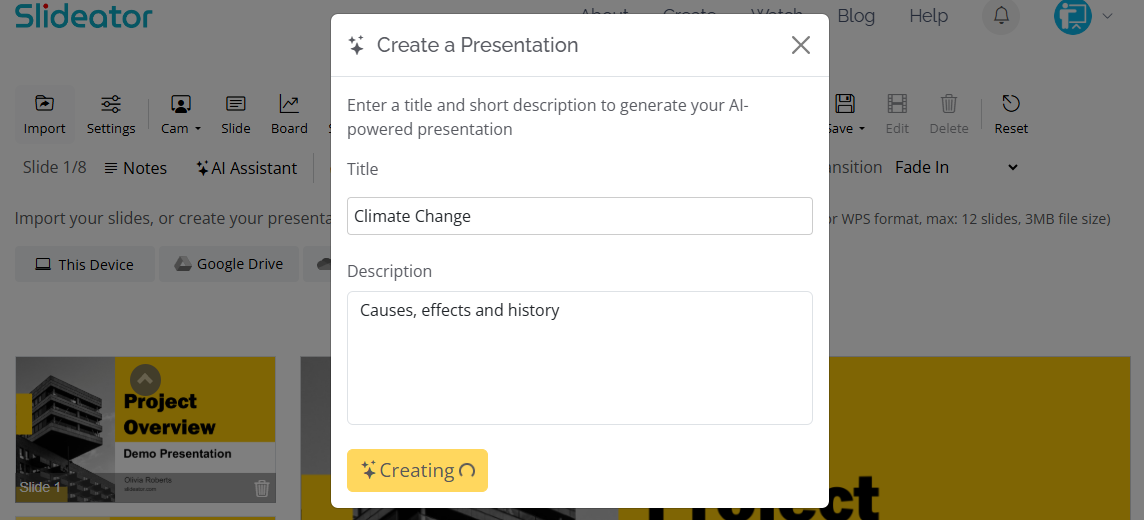
Step 1: Generate Content
Provide your presentation's topic title, description, or keywords. The AI will propose a complete presentation outline.
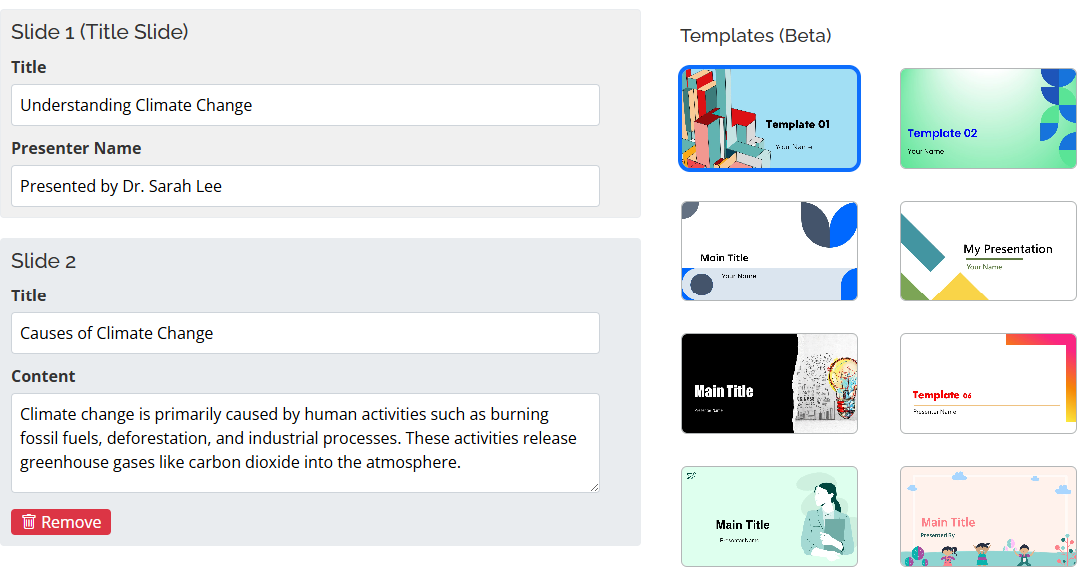
Step 2: Edit & Customize
Review and edit the proposed content for each slide. Add, remove, or modify slides as needed.
Step 3: Select Narration
Choose between AI-generated scripts for your own voice or full automatic narration with lifelike AI voices.
Using AI Tools Inside the Video Page
Slideator’s AI tools are designed to support you while you are creating your video, not before and not after. These tools help you think, explain, refine, and adapt your content directly within the video creation workflow.
AI Video Script
The AI Video Script tool helps you generate a complete narration for each slide based on your slide content, topic, and target audience. It is ideal when you want a clear, well-structured explanation without writing the script manually.
- Generate a full script for all slides
- Edit and customize before recording
- Use it with your own voice or AI narration
Discuss This Slide
This tool helps you explore and explain a single slide in depth. It is especially useful for complex diagrams, charts, or theoretical content that needs clarification.
- Generate talking points for the current slide
- Clarify concepts for students
- Improve explanation flow while recording
Ask a Question
The Ask a Question tool allows you to interact with your slide content as if you were a learner. It helps anticipate student questions and improve instructional clarity.
- Generate common learner questions
- Prepare clear answers in advance
- Enhance engagement and comprehension
Rewrite or Simplify Content
Use this tool to adapt your content for different levels and audiences. You can simplify language, shorten explanations, or rewrite content in a more friendly or academic tone.
- Simplify content for younger learners
- Rewrite for non-native speakers
- Adjust tone without changing meaning
Adjust Tone and Audience
Slideator allows you to tailor AI-generated content to match your audience and presentation style. This ensures your video feels natural and appropriate for its context.
- Academic or professional tone
- Friendly or conversational style
- Audience-specific explanations
YouTube Compliance Review
Overview
To ensure that all videos published on the official Slideator YouTube channel comply with YouTube policies and international content standards, Slideator applies a YouTube Compliance Review process before publishing selected user videos. This review is part of Slideator's commitment to quality, legality, and user safety, as outlined in our Terms of Use.
Why YouTube Compliance Matters
YouTube enforces strict rules regarding copyright, privacy, child safety, and content originality. To protect creators, viewers, and the Slideator platform itself, every video considered for publication on the Slideator YouTube channel must pass a quality and compliance check.
This process helps to:
- Prevent copyright claims or channel strikes
- Protect personal and sensitive information
- Ensure content is appropriate for a wide audience
- Maintain a high professional standard for Slideator content
Compliance Review Criteria
Before publishing a video to the Slideator YouTube channel, the Slideator Quality Team reviews the content based on the following criteria:
1. Licensed or Permission-Free Media
- The video uses only licensed, royalty-free, or permission-free music.
- Visual elements (images, icons, videos) are either:
- Original
- AI-generated
- Properly licensed for commercial use
Videos containing copyrighted music or visuals without permission will not be published.
2. Independently Created Content
- The video is created using Slideator tools and not copied or downloaded from YouTube or other video platforms.
- Re-uploaded, scraped, or reused videos from external platforms are not eligible.
3. Privacy and Personal Information
- The video does not expose personal, private, or sensitive information, including:
- Phone numbers
- Email addresses
- Home addresses
- Personal identification details
- Any people shown or mentioned must have appropriate consent.
4. Suitable for a General Audience
- Content must be appropriate for a general audience, including children.
- No:
- Adult or explicit material
- Violence or harmful behavior
- Hate speech or offensive language
This ensures compliance with YouTube's family-friendly and advertiser-safe guidelines.
5. Original or Transformative Content
- The video must be original or clearly transformative, meaning:
- It adds educational, explanatory, or creative value
- It is not a simple copy of existing material
- AI-assisted videos are acceptable as long as the final result is unique and meaningful.
How Slideator Uses This Review
- The compliance review is conducted internally by the Slideator Quality Team.
- Only videos selected for publication on the official Slideator YouTube channel go through this process.
- Passing the review does not affect:
- Your ability to download your video
- Your ability to share it on your own channels
- Videos that do not meet the criteria may still remain available on Slideator but will not be published on YouTube.
Important Notes
- Compliance review is not automatic approval for YouTube monetization.
- Slideator reserves the right to approve, request changes, or decline publication.
- Final publishing decisions follow the rules stated in the Slideator Terms of Use.
Need Help?
If you have questions about content compliance or how to prepare your videos for YouTube publication, please contact the Slideator support team or review the Effective Presentations and AI Assistant sections in this documentation.
Record, Live Stream, and Share Your Video Presentation
Slideator Video Presentation Recorder is a powerful tool designed to facilitate the recording and sharing of video presentations and tutorials.
Open Your Slides
Import existing presentations from your local device, Google Drive, or OneDrive, generate slides automatically using the AI Slide Generator, or create a new presentation from scratch with Slide Creator.

Using Slide Creator
Slide Creator is a built-in web editor designed specifically for Slideator users. It provides all the essential tools needed to create clean, professional slides without unnecessary complexity. You can add and format text, adjust fonts and alignment, insert images, manage multiple slides from the side panel, and preview your presentation — all within a simple, distraction-free interface.
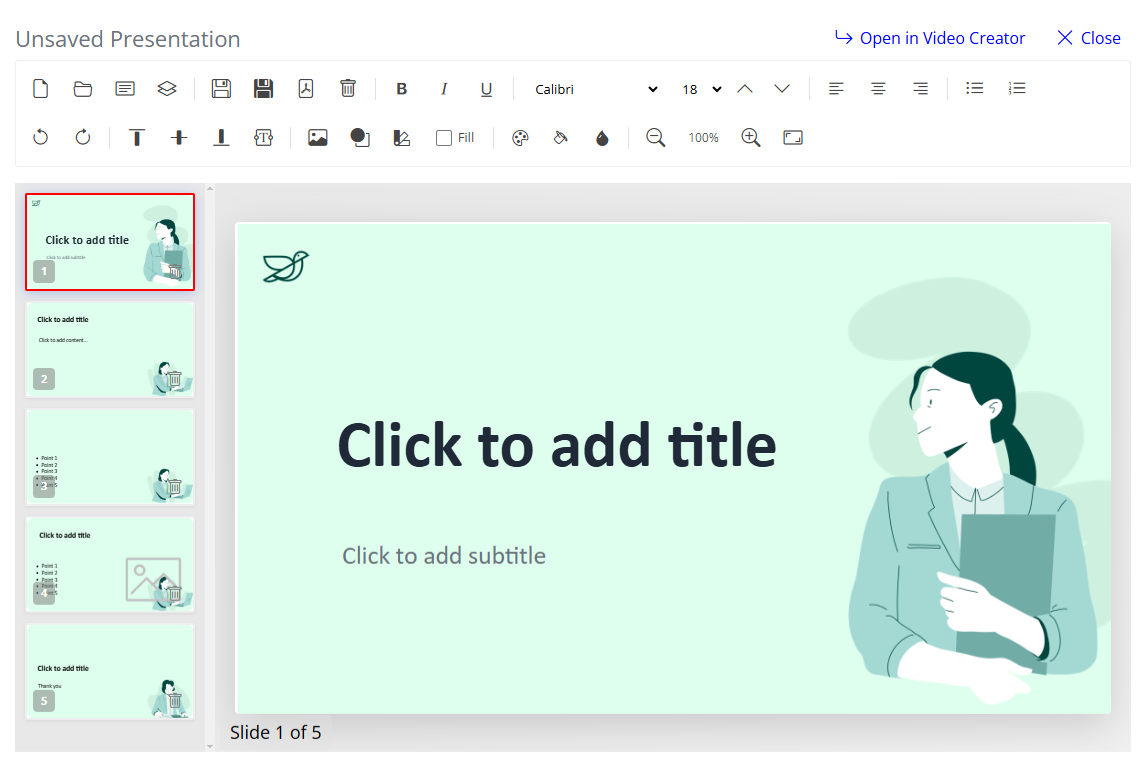
How to Create and Record Your Slides
- Select Slide Creator from the start options.
- Create and edit your slides using the toolbar and slide panel.
- Click Open in Video Creator when your presentation is ready.
- Choose to pre-record your presentation or start live streaming directly inside Slideator.
There is no need to download or re-upload files. Your slides open instantly in Slideator Video Creator, allowing you to move seamlessly from creation to recording or live broadcasting.
Configure Settings
Configure your media resources. Choose your audio device, test your microphone level, and adjust video settings before recording.

Select Video Resolution
Select the video output resolution based on your computer's performance and your audience's needs.
Start Recording
Click the Start button when you're ready to begin recording. Navigate through your slides seamlessly during presentation.
Start Live Streaming
Engage your audience in real time with Sidetorm's live streaming feature. Share your presentation instantly, interact via chat, and allow viewers to raise their hand to speak.
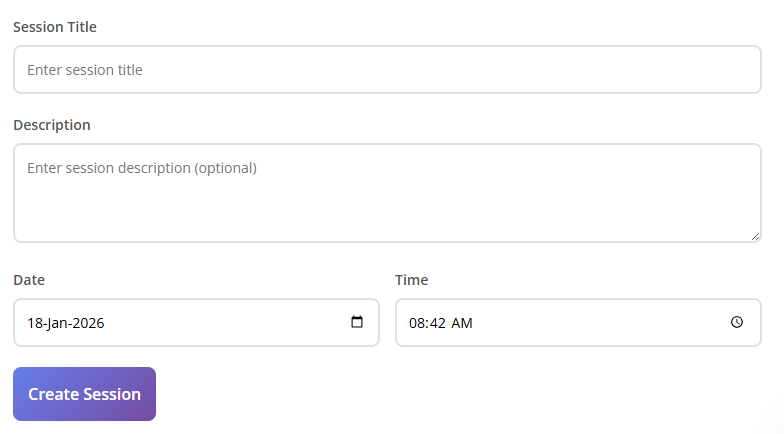
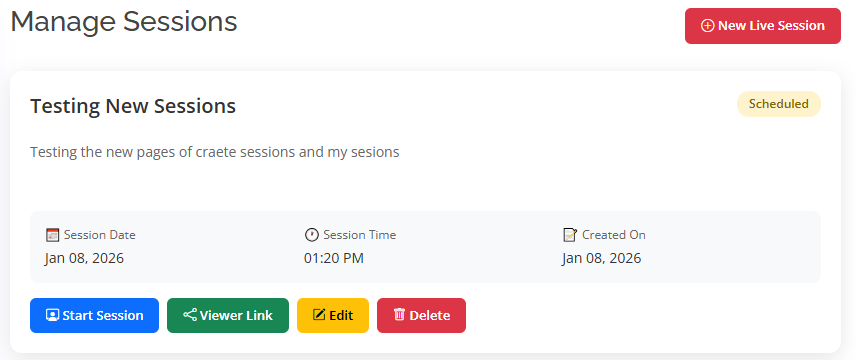
- Create or Select a Session
Go to My Sessions and either create a New Live Session (enter title, description, date & time) or select an existing one. - Access Your Links
Each session provides two links:- Presenter Link – to start and control the live stream
- Viewer Link – to share with your audience so they can watch
- Prepare & Start the Session
Open the session using the Presenter Link.
Configure settings:- Toggle Enable Recording to automatically capture the session (you can enable it anytime)
- Enable Chat for real-time audience questions and technical feedback
- Present & Interact
Narrate, annotate slides, and present just like in a regular recording.
Manage audience interaction:- View and respond to chat messages
- Approve or decline Raise Hand requests (one viewer at a time)
- End the Session
Click Stop Streaming when finished.
If recording was enabled, it stops automatically.
Preview, save, and immediately share the recorded video with your audience.
Tip: Test your setup and encourage early feedback via chat to ensure a smooth live experience for everyone.

Generate AI Auto Narration
Enhance your presentation with AI-powered narration. Customize message length, tone, audience, and language.

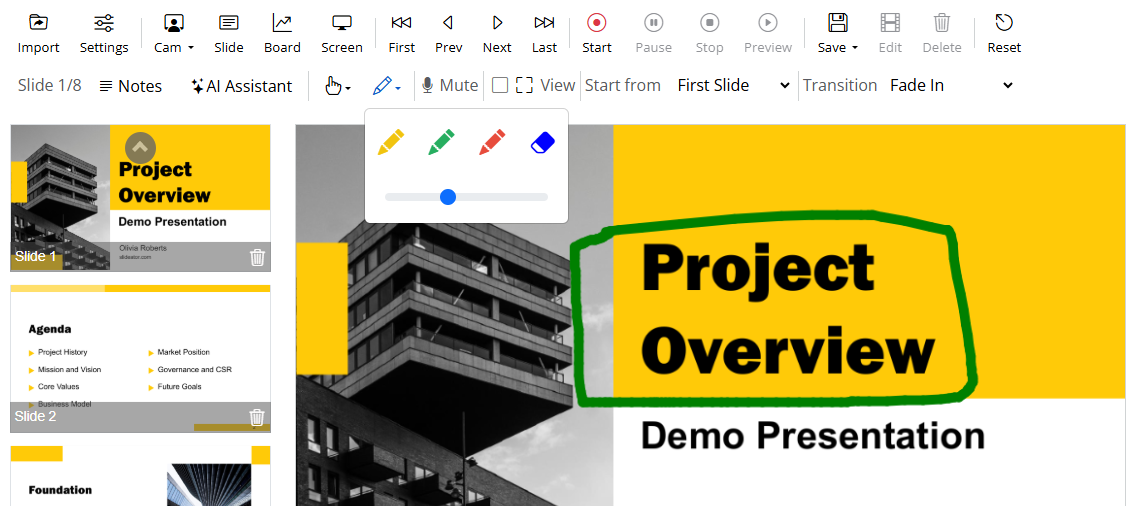
Annotate Slides
Use annotation tools to highlight key points. Choose from marker colors and pointer styles.
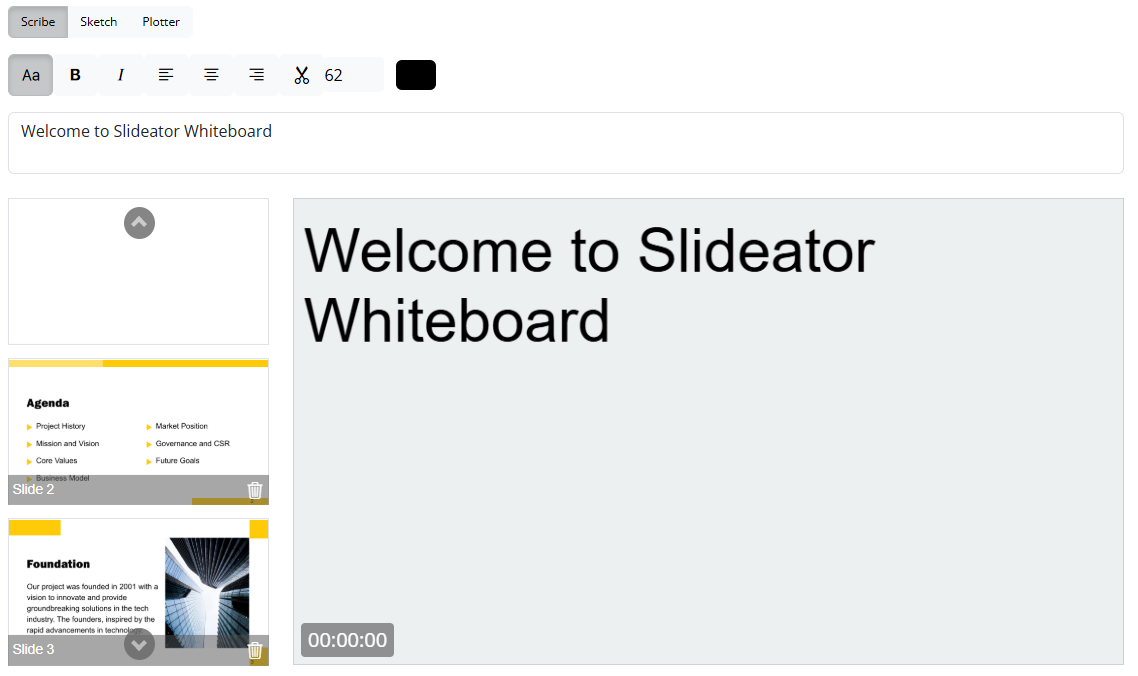
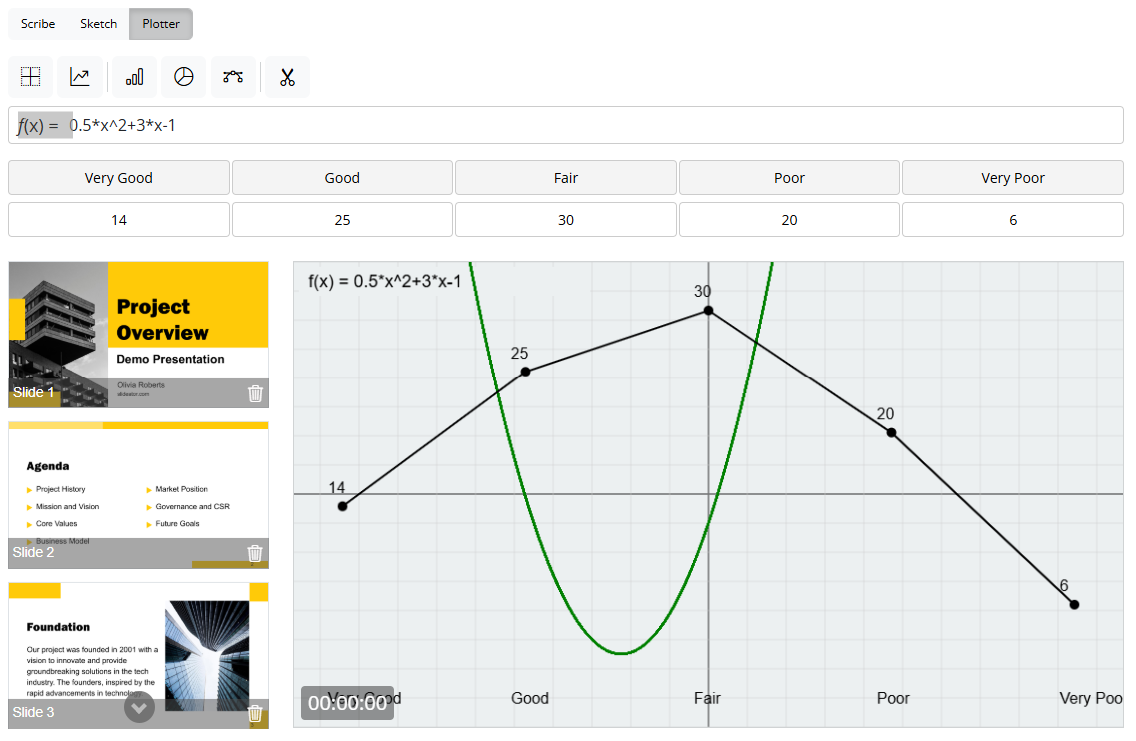
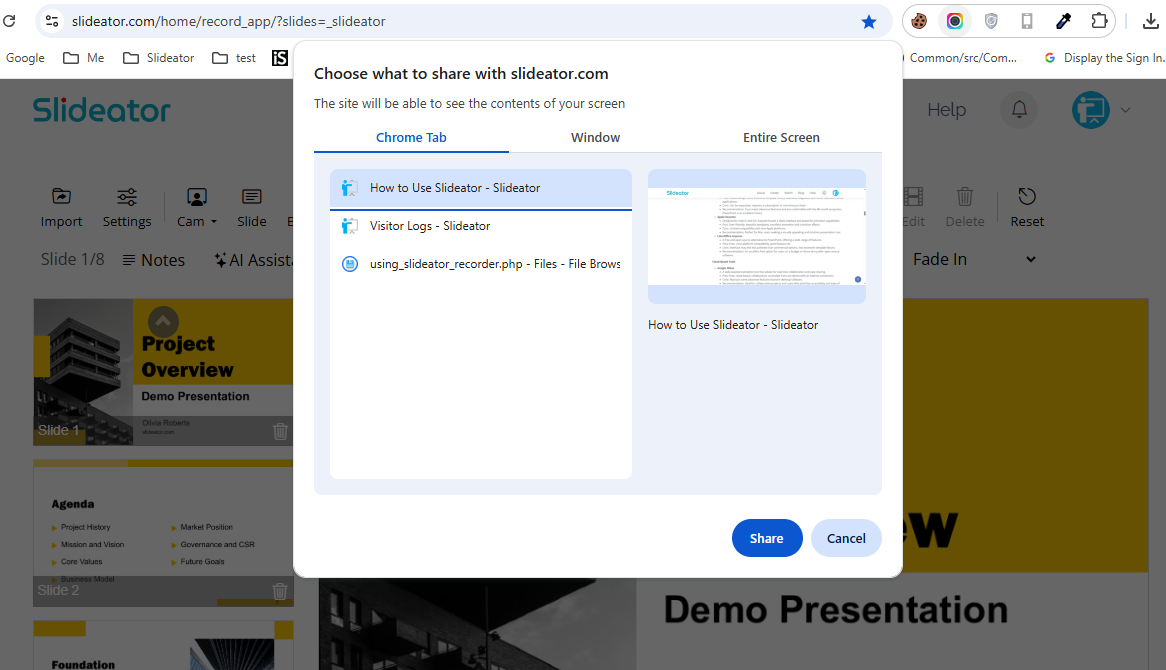
Use a Variety of Media
Slideator includes a powerful Board feature, transforming your presentation into an interactive workspace.

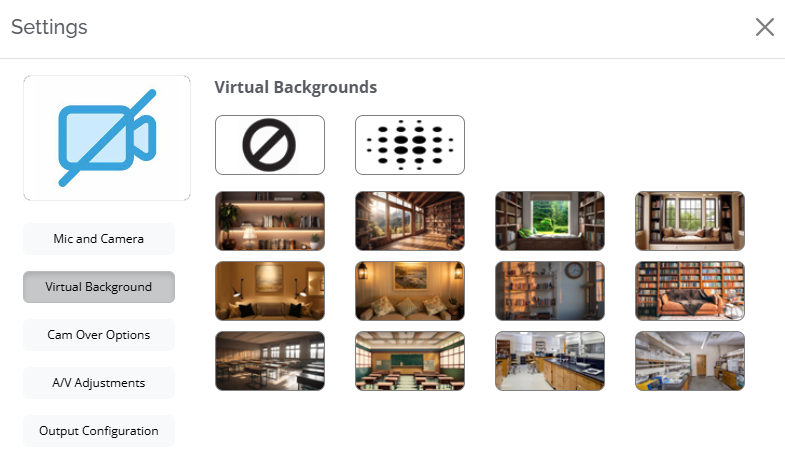
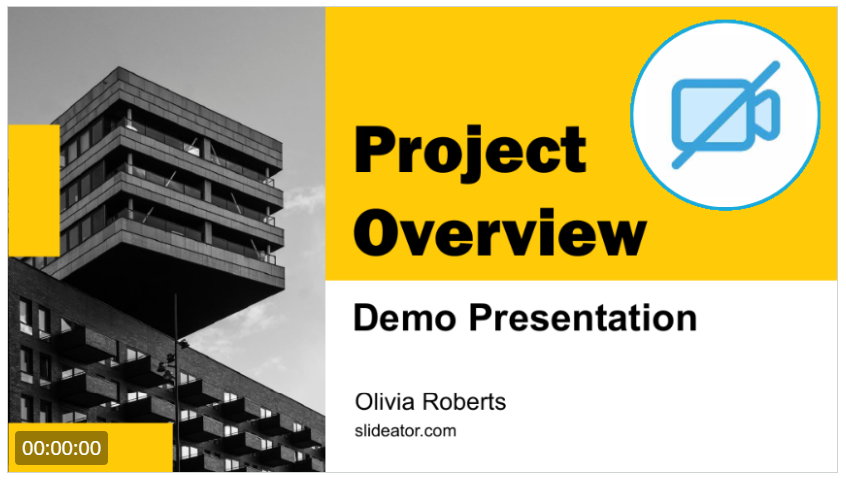
Select Camera Layout
Choose from a variety of camera layouts that best suit your presentation style.
Stop, Edit & Save
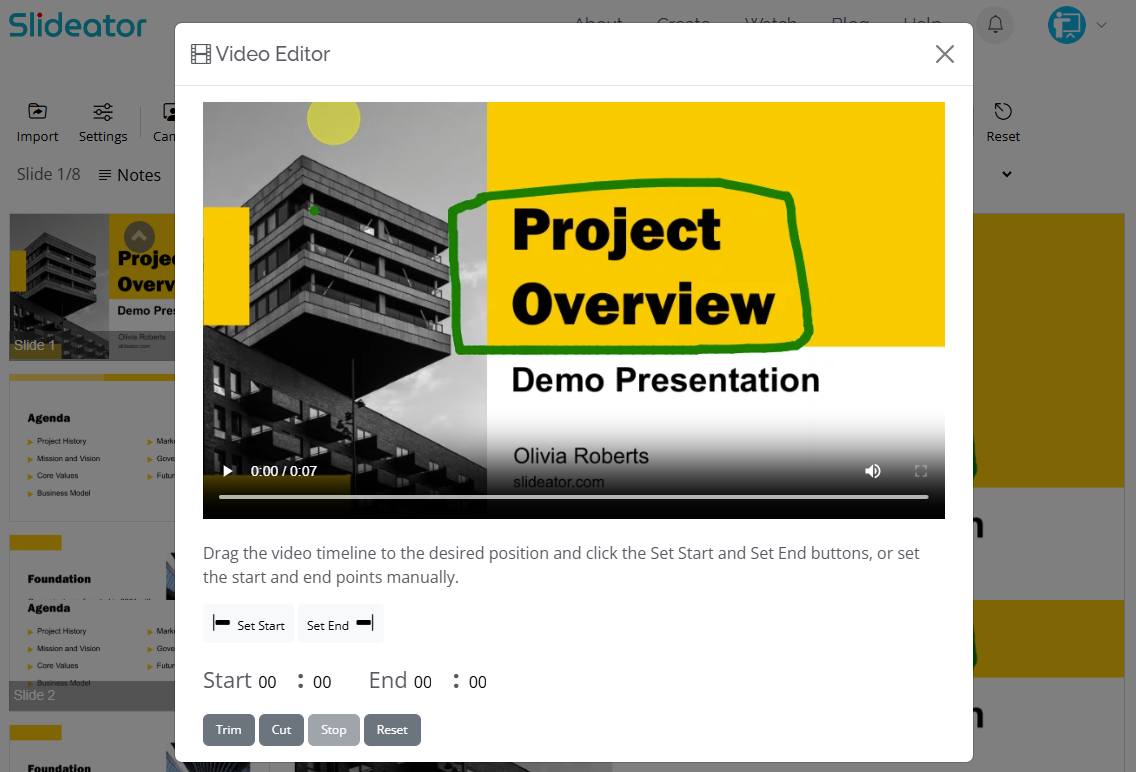
Once completed, click Stop to finalize your session. Preview and edit your recording as needed.
Delete & Re-record
If unsatisfied, click Delete to remove the video and begin a new session.
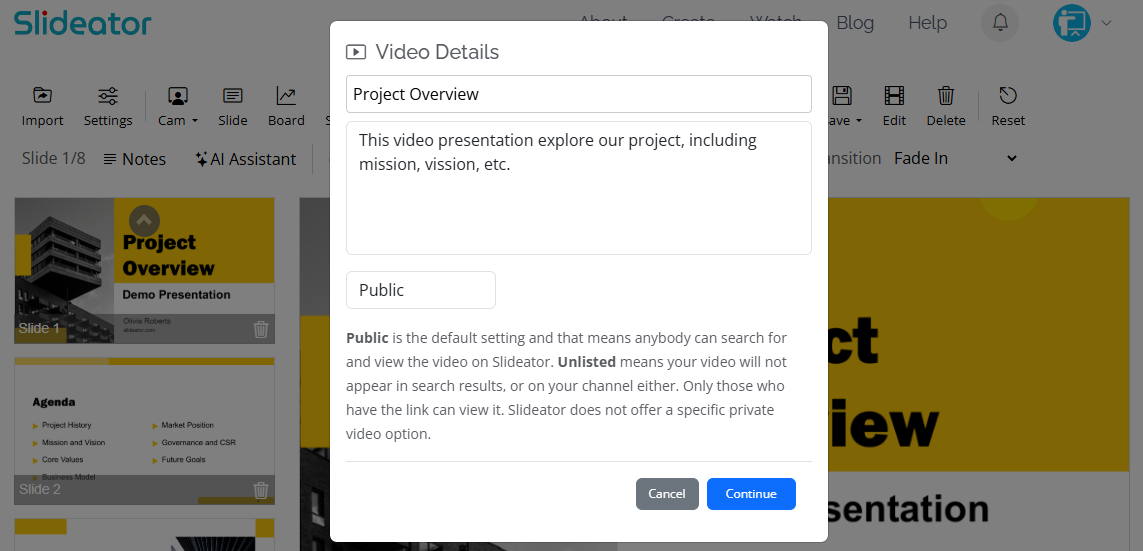
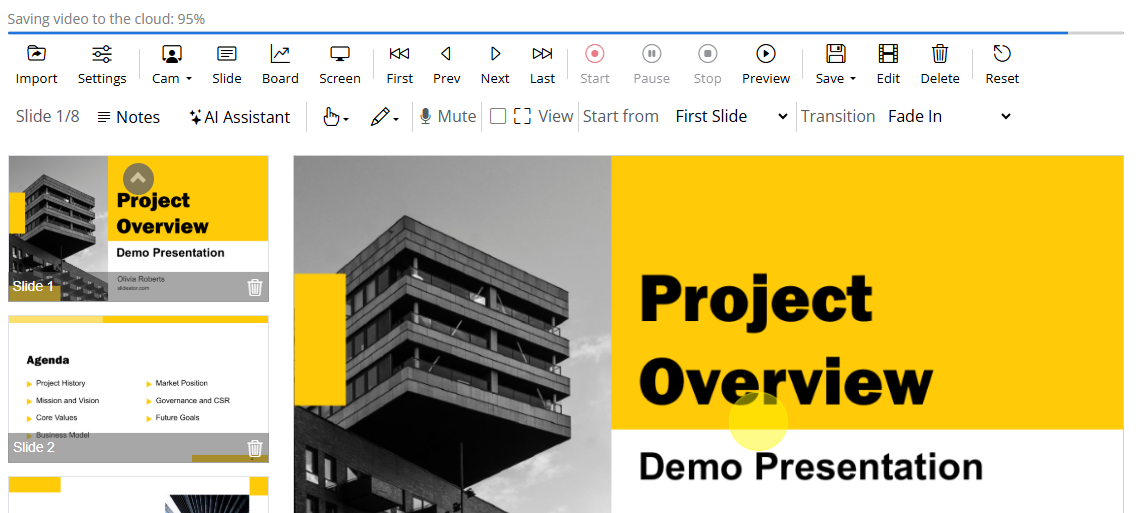
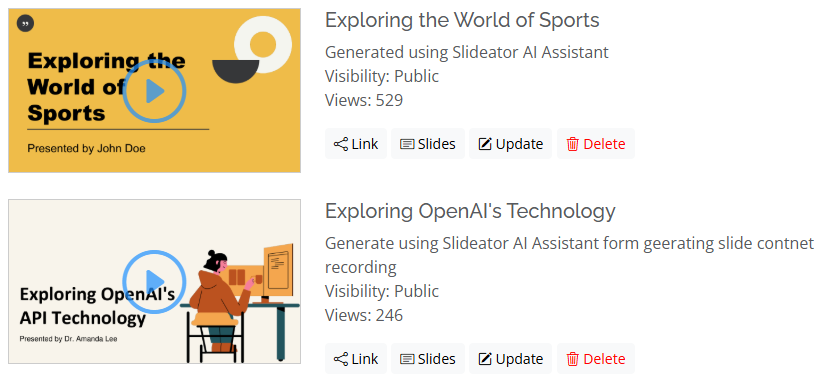
Save & Publish
Choose to save locally or publish to Slideator for instant sharing.
Creating Effective Video Presentations
When presenting online, maintaining your audience's attention presents unique challenges.
Keep Slides Simple
Your slides should support your message, not overshadow it. Avoid excessive text and complex visuals.
Use High-Quality Graphics
Always use sharp, high-resolution images. Avoid stretching low-quality images or generic clip art.
Choose Readable Fonts
Pick clear, professional fonts and use consistent typography throughout.
Record High-Quality Audio
Audio quality is just as important as visuals. Use a good external microphone.
Engage Your Audience
Include yourself in the video when possible. Seeing the presenter makes the experience more personal.
Get the Right Camera Angle
Position your camera at eye level or slightly higher for the most flattering and professional look.
Practical Use Cases
Slideator supports a wide range of educational and professional scenarios. Below are common ways educators and presenters use Slideator effectively.
- Flipped Classroom: Record lectures for students to watch before class.
- Lecture Capture: Turn traditional slides into narrated video lessons.
- Microlearning: Create short, focused videos explaining one concept.
- Exam Review: Explain solutions and key concepts step by step.
- Professional Training: Create onboarding and instructional videos.
Tips & Troubleshooting
- Use Google Chrome or Microsoft Edge for best performance.
- Test your microphone before recording.
- Close unused tabs to improve performance.
- If AI narration fails, refresh the page and try again.
- Ensure browser permissions for camera and microphone are enabled.
Privacy Notice
Videos recorded using the Slideator Video Recorder are generated within your browser and remain accessible only within the same browser session.
Privacy Features
- Local recording - No internet connection during recording
- Secure browser session storage
- Optional sharing only when you choose to publish