Using Slideator Desktop Recorder
1. Click Open Slides button in the toolbar to import your PowerPoint presentation slides.

2. In the left-hand panel, set the following options:
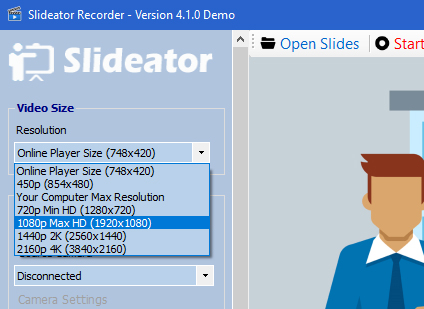
Video Size
The resolutions you see (360p, 480p, 720p, or 1080p) represent the number of horizontal lines a video has from top to bottom. So, a 480p video is made up of 480 lines stacked one on top of another, with each line being 852 pixels wide. In other words, a 480p video has a resolution of 852×480 pixels.
Choose the appropriate video resolution. The higher resolution the higher video quality. Increase your video resolution (for example: 1080p Max HD) if your audience are intended to watch the video in large screen, or if you record the full computer screen (for example: recording small text in the screen, particularly if you teach coding or graphics).
Camera
Set cam source and settings, and turn on your webcam before recording if you need to show your face or overlay your live camera feed while recording at the same time. Remember; recording with your webcam is very useful for social presence and can be a great way to connect with your audience. Showing your face on a video allows your audience to identify with you and see your facial expressions while presenting a topic. During the recording, you have the option to switch between your webcam and your slides.
Audio Settings
Select your audio device and audio level. Remember to record a short testing video before recording your main video presentation.
Capture Options
The mouse cursor is important while recording, so make sure you are it is as effective as possible. However, moving your mouse cursor around and around as if you are talking is going to leave your audience confused and unsure of where they should look. Instead, move your mouse cursor deliberately, and with purposeIn Slideator Recorder, mouse cursor can be recorded and highlighted with a hot spot. Check/uncheck mouse cursor options as required:
Capture mouse cursor: Check/uncheck to capture mouse cursor in output video.
Show mouse hotspot: Check/uncheck to show yeallow circle around thw cursor.
Animate mouse clicks: Check/uncheck to animate mouse clicks events.

3. Click Record button and wait for the five-second countdown before starting recording.
4. Use the slide navigation menu at the bottom bar to move to the next, previous, first, or last slide while recording.
5. Draw over slides or annotate your slides using the red and blue marker. Click Eraser icon to clear your annotations.
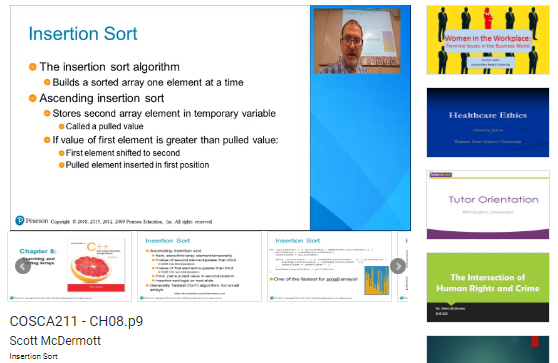
6. If you have a webcam attached to your computer, you can capture your live camera feed during the presentation. This video presentation can then be used as a picture-in-picture video, perfect for showing the social presence of the presenter during the presentation.
Participants strongly prefere online video presentations with the face and perceived it as more educational. They spend about 40% of time looking at the face and switched between the face and slide every few seconds. Many institutions employ the picture-in-picture instructional format in their video lectures. Moreover, training instructors and teaching staff on its usage, as well as allocating time for editing, is a time-consuming addition to the course production process. The picture-in-picture (cam beside slide and cam over slide) features of allow you to show a video of yourself alongside the audio and presentation. 7. Toggle between the five different recording layouts while recording:Slide
To present slides only in full-screen mode.
Write
To show the whiteboard also and type notes while presenting using the keyboard making it an ideal tool to add more details, or explain equations using words, numbers, and symbols.
Draw
To show the drawing pad and draw lines, curves, graphs, and shapes on the screen to emphasize or clarify an idea or relationship, so the demonstration can be clearer.
Cam
To show your face cam only in full-screen mode.
Side
To show slides and live camera feed in side-by-side mode.
Over
To apply the overlay live camera feed on top of the slides. Move your mouse over the camera layer (the pointer will be turned into a cross with arrows ✥) to move the camera over the slide.
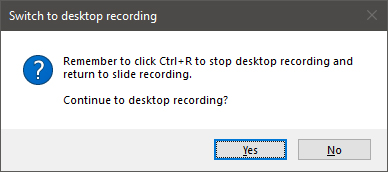
Screen
To record the entire computer screen, including desktop and any application running in your computer.


9. Click Stop button to finish and save your video in one of the following formats:
ASF format
To save your video in ASF format and upload it to Slideator. This format combines video with slides and allow your audience to move to the respective video content and control both the progress and length of video tutorials.
WMV/MP4 format (Pro version only)
To save your video in the standard WMV/MP4 format, so you can upload it to YouTube.
10. Click Play button to select and review your video before uploading.
11. Click Upload to open Slideator website and upload your ASF video to Slideator, or go to Slideator website and click Upload link to upload your video and follow the instructions. Slideator platform uses the latest YouTube Data API technology to upload, process, and host video tutorials and combine video with scrollable slide thumbnails, allowing the audience to move to the respective video content and control both the progress and length of video tutorials.
When you upload a video, it will initially be processed in low resolution. This process helps you complete the upload process faster. When the upload flow is complete, your video will be available to stream in low resolution, on a wide variety of devices.12. Once video uploaded and processed (2-5 minutes), copy and share the video page URL with your audience.
Also, video presentations can easily be embedded inside any Learning Managemet Systems (LMS) like Moodle, blogs (like WordPress), or any standard HTML-based website. Click Embed button to copy the embedding code into clipboard, then paste it in your prefered platform using HTML code icon in Moodle, or code/text editor in WordPress.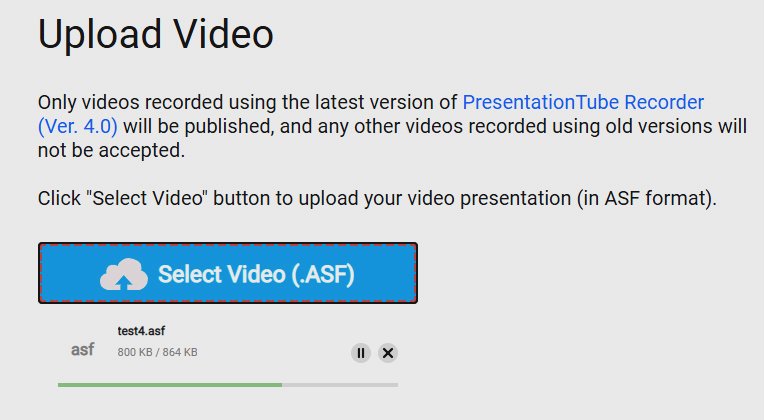
To ensure your video is effective and relevant, follow a few simple rules:
Keep it short
Statistics show that even the most interesting videos can lose the audience’s attention in the second minute of playback. Place value on your user’s time and keep your video short (15-20 minutes).
Make it clear
Do not make your audience wait for your key idea. Clearly demonstrate it upfront and then in sequence demonstrate all relevant details. As soon as you are done wrap up the presentation.
Summarize your argument
Help users memorize key information by repeating it several times. Start out with your key idea, explain it throughout the presentation and then summarize it again at the end.
Create a relevant script
It is very important that your presentation is brief. Keep it relevant and pithy and accentuate the main points. Ensure your presentation is understandable by using natural flowing language laced with inviting humor.
Use quality graphics
Because video is the central part of your presentation, it must be high quality. Use a high-resolution camera and make the recording in a professional studio. Create a rich, dynamic feel. To attract the attention of the audience, make your presentation dynamic: use animation and transitions and freshen up your presentations by changing the layout of your slides.

Get Started
Slideator Recorders
Using Cloud Recorder
Using Desktop Recorder
Guidelines for Effective Video
Slideator Blog